The following Race Header Menu appears after clicking the "RACE" button on the main menu. The Race Entry Menu allows you to add or delete racers, or edit a racer’s information. To easily enter racer information, store a list of racers with their points on your hard drive. To obtain this information go to the ACA Points web site at [National Points][2]. Refer to Annex B for instructions on retrieving files from ACA Points
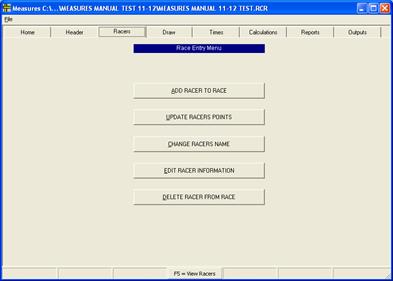
Click the "ADD RACER TO RACE" button to begin race entries.
5.1 Add Racer to Race
The following dialogue box allows you to download the racers from an existing points file. If you have not already done so, retrieve a list of racers and their points from the ACA Points web site. Refer to Annex B for instructions on downloading racers from ACA Points

5.1.1 Click ‘Yes’ to add racers.
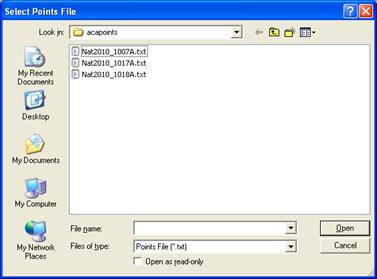
5.1.2 The following dialogue box appears prompting you to create or specify a folder to find the points list
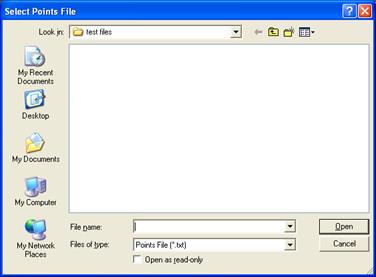
5.1.3 Select the directory where your points file is stored in using either the icons on the left or the ‘Look in’ window at the top.
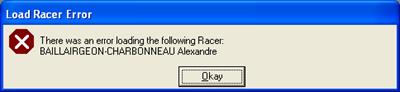
5.1.4 You might get the following error message while the points file is loading. This means that there is a problem with the athlete’s name (ie; too long, too many hyphens, apostrophes or a double first name). If the athlete is not in the race just hit okay. If the athlete is in the race you will have to contact Dick Beare or the PSO to correct the error.
5.1.5 Click once to highlight the selected document and click the “Open” button to open. The following dialogue box appears.
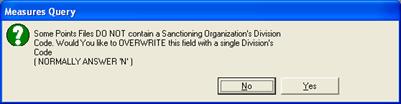
5.1.6 Click the ‘No’ button. The following Measure’s Query is displayed.

5.1.7 Click the ‘No’ button. The following window opens:
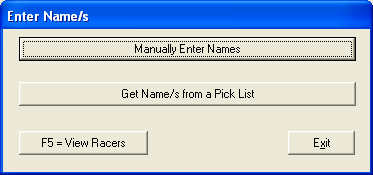
5.1.8 This window gives you the option of manually entering the name or getting the name from a pick list. To manually enter a racer go to Section 5.1.9. To ‘Get Name/s from a Pick List go to Section 5.1.10.
5.1.9 TO ADD RACER TO FILE MANUALLY
Choose ‘Manually Enter Name/s’ on the previous ‘Enter Name/s’ window. In the next ‘Enter Name/s’ window hat is shown (see below) enter the Last and First names of the athlete in the window.

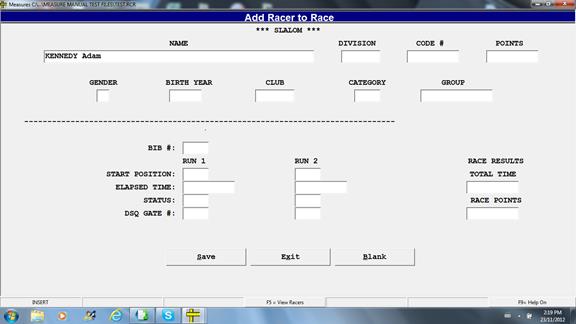
5.1.9.1 Type last name, then first name in the window and select ‘NEXT’. The following window is then displayed.
5.1.9.2 Fill in ‘Division’, ‘Code #’, ‘Points’, ‘Gender ‘Birth Year’, ‘Club’ and ‘Category’ and ‘Group’.
5.1.10 TO ADD RACER TO FILE USING POINTS LIST
**Note the Selection Options. **
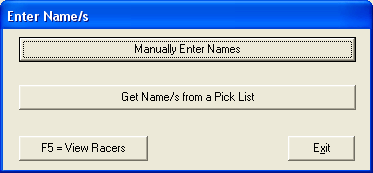
5.1.10.1 In the following ‘Enter Name/s’ window, select ‘Get Name/s from a Pick List’.
5.1.10.2 This will open the points file as shown below
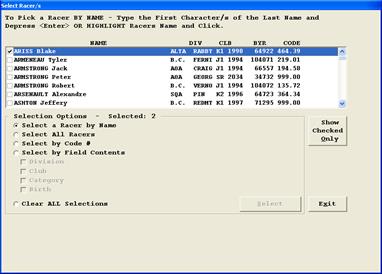
5.110.3 Pick the racer/s you want to add to the race as noted in the Select Racer/s
5.1.10.4 Click on ‘Exit’ to enter the racer/s in the file.
5.1.10.5 After you’ve selected the racer/s you want entered, the following Measures Query window is displayed.

5.1.10.6 Click on ‘Continue’ to complete your entries.
-
Select All Racers: This will select all racers in the database. NOTE: This is rarely used as all racers in the database do not show up to all races. However you might consider using it if it looks like most will be attending and it would be easier to deselect (must be done individually) those that are not attending.
-
Select by Code#: Used to find a competitor if you have a correct code number but a misspelled or missing name.
-
Select by Field Contents: You can select all athletes by one of the following choices: Division, Club, Category, or Birth.
-
Clear ALL Selections: This will deselect all selected athletes.
5.1.7.7 When finished, click the ‘Save’ button, then the ‘Exit’ button on the ‘Add Racer to Race’ screen.
5.2 Update Racers Points
The ‘Update Racers Points’ button will let you change the racers points in the middle of an event. This is useful if you are using the same competitor list for several races.
5.2.1 When you click on ‘Update Racers Points’ the following window appears:

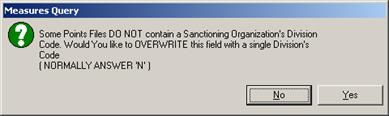
5.2.2 clicking on yes, brings up the following window in which you must indicate which points file you want to use
5.2.3 The following message will appear – your answer is ‘No’:
5.2.4 The following message will appear – you answer ‘No’:
5.2.5 The following message then prompts you to rename the new file:
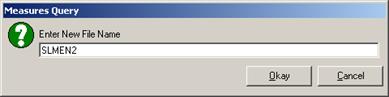
Measures Message – This routine copies ALL of the Racers in the present file to a new file updating the points in the new file
5.2.6 After renaming the file, click on Okay, and the following window will appear:
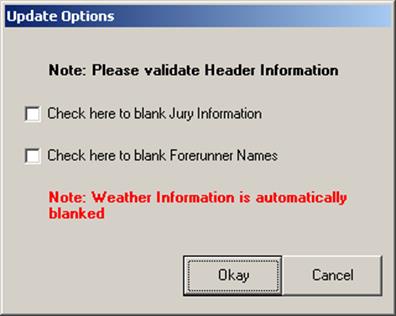
5.2.7 Select the update options that you want. Notice that you will have to re-enter the weather information as it has been blanked.
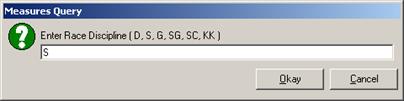
5.2.8 The following window will prompt you to select the discipline for the new race.
5.3 Change Racer’s Name
The ‘Change Racer Name’ screen allows you to edit a racer’s name in case of a spelling error.
5.3.1 Click the ‘Change Racers Name’ button on the Race Entry Menu. The following window and dialogue box appear.
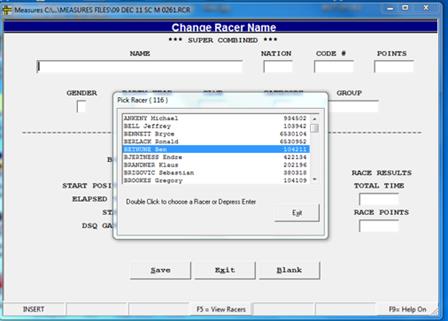
5.3.2 Double click on the racer’s name to change from the list. Click the down arrow beside the racer’s name list to view more names. After clicking on a racer’s name the following window will appear – it will have the racer’s name that you have clicked on. Select ‘Next’.
5.3.3 It will bring up the Change Racer Name Window with the racer’s information in it and you can then edit the racer’s name and click the ‘Save’ then ‘Exit’ buttons at the bottom of the screen.
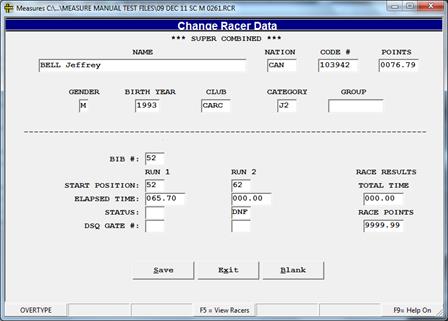
5.4 Edit Racer Information
The ‘Edit Racer Information’ section allows you to change any of the racer’s information.
5.4.1 Click the ‘Edit Racer Information’ button on the Race Entry Menu. The following window and dialogue box appear.
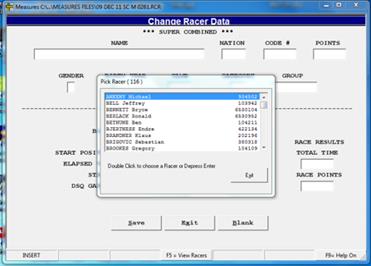
5.4.2 Double click on the racer’s name to edit racer information. Click the down arrow beside the racer’s name list to view more names.
5.4.3 Edit the racer’s information and click the ‘Save’ then ‘Exit’ buttons at the bottom of the screen.
5.4.4 The GROUP window can be particularly useful when running Nancy Green races where athletes compete not as individuals but as teams. Measures now assumes that a points list that has an extra field after the points that this field is a Group field. This will allow those of you that wish to automatically load the Group field a method for doing this. Please note this field comes after the Kinder Kombi points.
5.5 How to have a Racer Show in Unofficial Results Only:
This will permit a racer to be removed from the penalty calculation and the official results; but, will allow them to show up in the Unofficial Results. This opens the door for foreign racers to race in a national race and yet not be included in the calculations that are transmitted to the [www.acapoints.ca][2] website. It could also be used to remove non-carded Masters Racers from a Masters Race before uploading the results. THEY NO LONGER NEED TO BE DELETED.
5.5.1 Enter the edit racers window and change the athlete’s competitor number to 0000000 and save.
5.6 Delete Racer From Race
The ‘Delete Racer From Race’ screen allows you to remove any racer from the race.
5.6.1 Click the ‘Delete Racer From Race’ button on the Race Entry Menu. The following window and dialogue box appear.
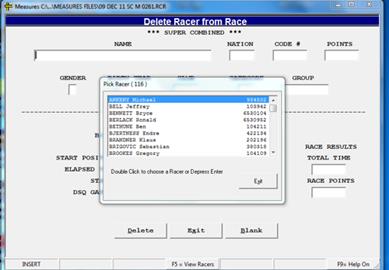
5.6.2 Double click on the racer’s name to delete. Click the down arrow beside the racer’s name list to view more names.
5.6.3 Click the ‘Delete’ button at the bottom of the screen. The following dialogue box will appear.

5.6.4 Click ‘Yes’ if you are sure you want to delete the racer.
5.6.5 Click the ‘Exit’ button on the ‘Delete Racer from Race’ window.
5.6.6 Click the ‘Exit Menu’ button on the Race Entry Menu to return to the Main Menu.
5.7 Print a Competitor Report
After completing the Race Entry Menu, print two reports for the Draw/Team Captains meeting:
-
List of Competitors by Club (a double check for coaches to ensure all their athletes are entered – also helpful in reconciling race fees that a club owes); and
-
List of Competitors by points which the TD and coaches will like to see as it shows who is in the draw and the start order to the rest of the field.
5.7.1 Click the ‘Print Reports’ button on the main menu.
5.7.2 Click the ‘Competitor Report’ button. The following dialogue box is displayed.
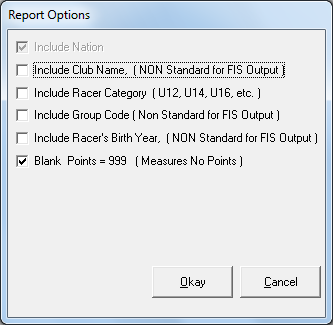
5.7.3 Click the report options you require. NOTE: A check mark indicates the option is selected. To de-select, click on the check mark.
5.7.4 Click ‘Okay’. A dialogue box appears asking you: “Include BIB Numbers if Available?”.

5.7.5 Click Yes or No. The following Sort Options box is displayed.
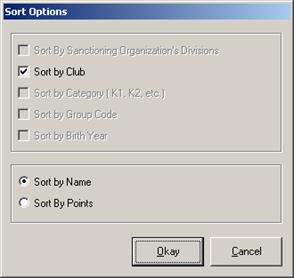
5.7.6 Click the options that describe how you’d like to sort the racers.
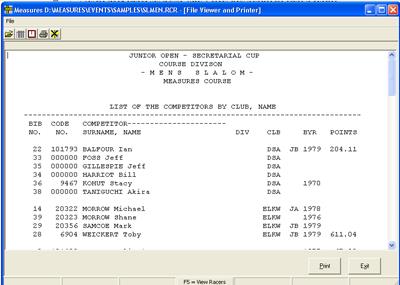
5.7.7 The following figure illustrates a sample of the List of the Competitors by Club, Name report. Click the ‘Print’ button at the bottom of the screen to accept, or the ‘Exit’ button to return to the Report Menu without printing.
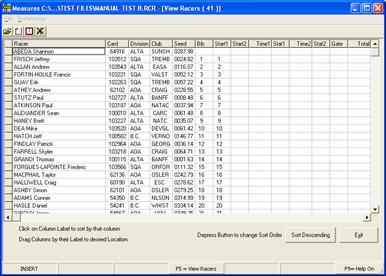
5.7.8 The following figure illustrates a sample of the List of Competitors by Points report. Click the ‘Print’ button at the bottom of the screen to accept, or the ‘Exit’ button to return to the Report Menu without printing.

[2]: http://www.alpinepoints.ca/> [3]: ftp://ftp.fisski.ch.alpine/lists [4]: <www.fis-ski.com/uk/disciplines/alpineskiing/homologations.html>